House Battery-Lithium
Upgraded to LiFePo4 for the House Bank.
I upgraded from three Firefly AGM batteries to a single UL approved Lithionics 320Ah battery (LiFEPo4 or LFP for short).
I dropped 160lbs in weight, regained 2/3 of the center cockpit lazarette space back. Gained 1/3 more space in the port lazarette. I'm able to run the inverter for high wattage 120volt AC loads from 100% SOC down to 20% SOC. I can run the hot-water heater (65amps at 12volts).
This is the most intense, complicated, and expensive upgrade I've performed on Channel Surfing. For us, it also was worth every penny spent. It's at least 40 hours of my labor, in addition to about $7k in parts. I've done this twice, as another boater asked me to convert their '22 model R27-OB from a NW edition to the Channel Surfing edition.
My Firefly batteries failed on me. Until India gets their quality control fixed, I would not recommend their purchase. But once you go LFP, you'll never want to go back to AGM.
LFP batteries require a different charge profile. Therefore, all charging sources must support LFP. If they don't, they must be upgraded or adapted to support LFP. The charge sources on an RT27-OB are: 20 amp Battery Charger, Solar Charger, Yamaha F300, Yamaha T9.9.
I worked directly with Bruce Schwab at Ocean Planet Energy (OPE) through a paid engagement. OPE reviewed my design, provided oversight and validation, and reviewed the final installation for adherence to ABYC standards. Being a gasoline powered boat, everything added is ignition protected.
I recommend anybody looking at performing something similar to this upgrade go through this course. (I did, and I felt it was worth the effort).
Boat Electrics 101 - BoatHowTo.comLithium Iron Phosphate (LFP) upgrade
Installed a battery monitor (Victron BMV-712) (required for any LFP install).
Replaced the PWM solar controller with a Victron Smart MPPT 100/30 solar controller.
Replaced the Engine to House Blue Sea ACR with a Victron Smart Orion TR 30amp 12volt DC to DC charger.
Replaced the House to Thruster Blue Sea ACR with an Victron Smart Orion TR 30amp 12volt DC to DC charger.
Added a Kisae ABSO 60amp battery charger. (Replaced my Skylla 70amp).
Disconnected the Kisae ABSO 20amp battery charger from the house bank. It's dedicated to engine and thruster batteries.
Re-wired the port, starboard and center lazarette.
Moved the T9.9 kicker from the house battery to the thruster battery.
Installed a Blue Sea Safety Hub 150.
Installed MRBF fuse block for Thruster battery.
Installed MRBF fuse block for Engine battery.
Installed a Safety Fuse for Solar (40amps).
Installed a Safety Fuse for DC to DC chargers (80amps).
If you're looking to upgrade your house battery bank, consider upgrading solar first. You may find that you won't need as large of a battery bank, and may not even need to upgrade to LFP.
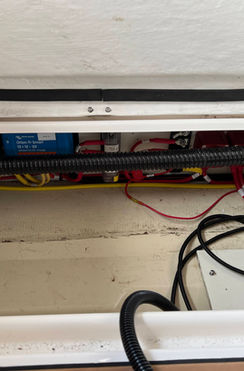
The installation mostly comprised of re-wiring the entire cockpit lazarette area (port, center and starboard). Space is paramount, and the only way to get the space required was to clean up the wiring. This project started with design. I put together detailed drawings that illustrate how everything needs to be wired, and where the equipment needs to go to fit. The drawings were drawn to scale to play Tetris, and figure out how to make everything fit.
Design Drawings (Documentation) for illustration:
Electrical Schematic for the R27-OB NW edition (Factory Standard)
Electrical Schematic for an RT27-OB LE edition with LFP (Factory Standard)
For LFP (LiFEPo4) with Lithionics
I purchased the following:
(1) Kisae ABSO 60 amp Battery Charger dedicated to the LFP battery
(1) Blue Sea Terminal Feed Through Connector (Red, 3/8" stud)
(1) Blue Sea Terminal Feed Through Connector (Black, 3/8" stud)
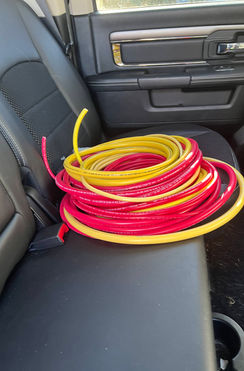
Cable in various sizes and lengths (#10awg, #8awg, #6Awg, #4awg, #2awg, #1awg, #1/0awg, #2/0awg) (Red, Yellow and Green)
Various MRBF fuses (50 amp, 60amp, 175 amp).
Various AMI/MIDI fuses (40amp, 60amp, 80amp, 175amp)
Various ATC (blade) fuses (1 amp, 3 amp, 5 amp)
Ancor 3/4" 3:1 adhesive lined shrink tubing (Red and Yellow)
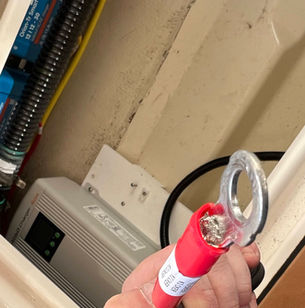
Ancor tinned copper, closed end, battery cable lugs. (various sizes)
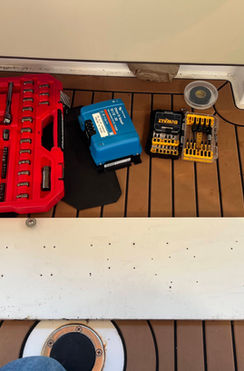
10ton Hydraulic crimp tool with 6 sided hexagon dies that'll crimp up to #2/0 AWG cable.
UL approval was important to me. Most LFP batteries do not meet this standard. That big 250amp 12volt DC breaker I had to install next to the Li3 battery is required to maintain the UL approval for this particular 320ah Lithionics battery that I installed. That breaker has an AIC rating of 100,000 amps. MRBF and ANL fuses have AIC ratings of 10,000 amps which is generally insufficient for LFP.
I'm still tallying receipts... but I know the total cost of the upgrade was around $7,000 and was 6 full days of my own labor. The design, drawings, and research was also very time consuming, consisting of many days worth.
I spent 3 weekends on the boat installing the above, working daylight hours.
Last update: 9/11/2025


